Don't worry, take a shower. Automating my mechanical ventilation
Who doesn’t like a nice hot shower? Every time I take a shower I forget something quite important: I have to turn on my in-home ventilation system to prevent moisture buildup. The bathroom does not have a window so the only way to dehumidify the air is through the air vent. There is one minor problem though… The knob to control the the ventilation system is located in the kitchen; which is not very convenient if you just stepped under a nice hot stream of water.
Mechanical ventilation
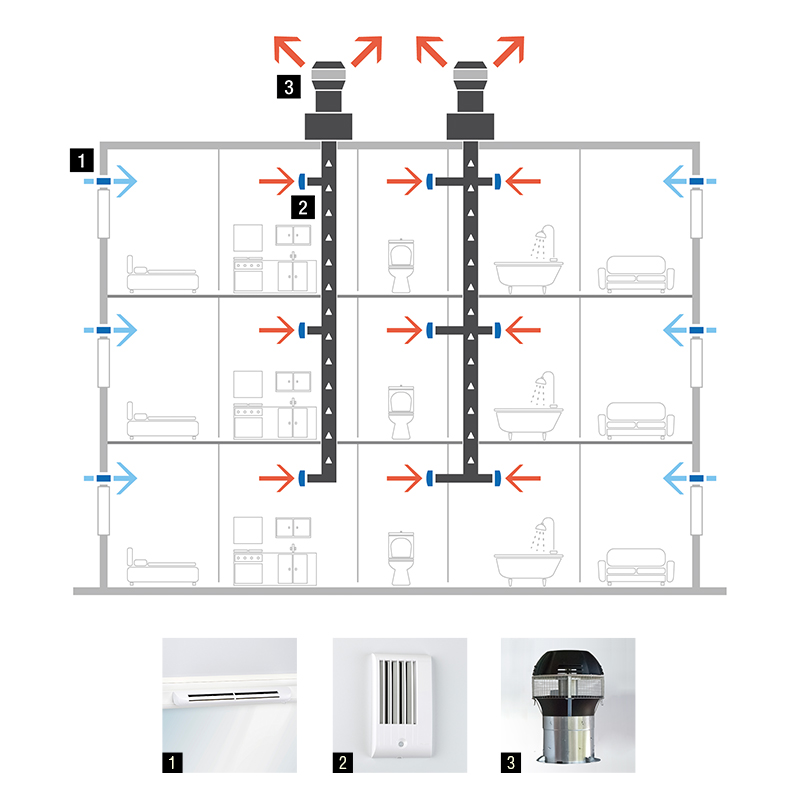
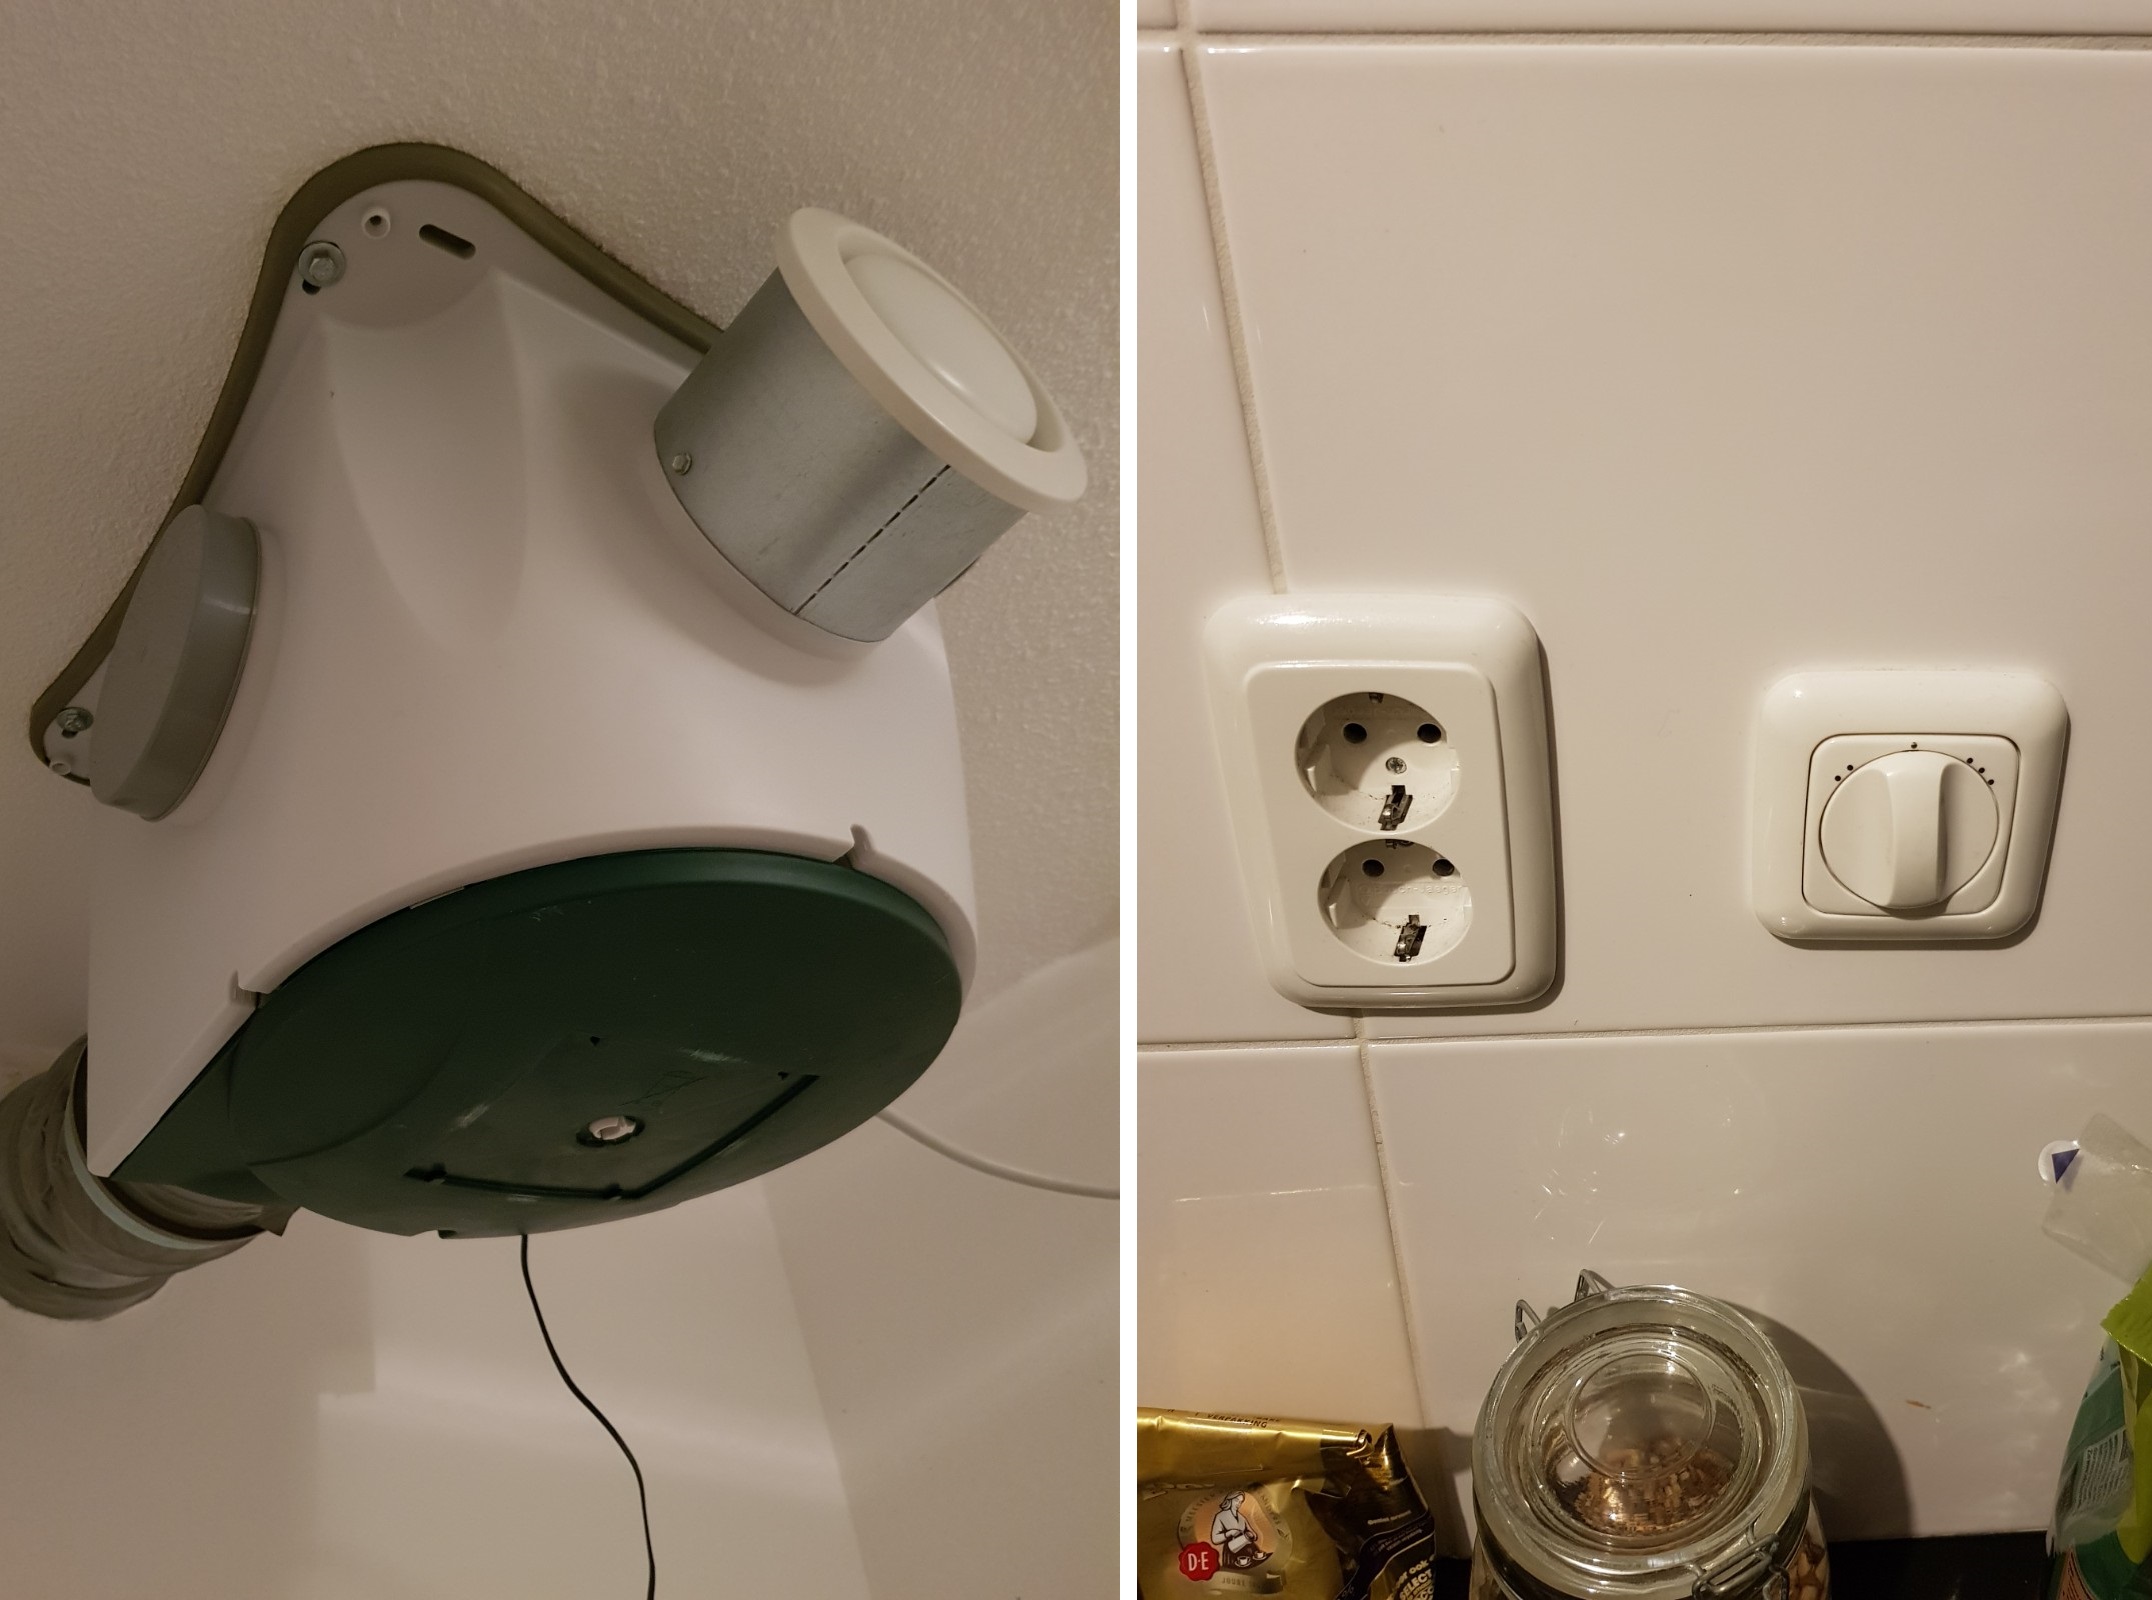
My apartment has an individual ventilation system, which is basically a big fan with some air ducts. I didn’t know what kind of system I had, but after removing the lid I found out it is a Stork Zehnder CMFe P(erilex) fan. The kitchen has a, very simple, knob which controls the fan speed. It has three settings, low (which is the minimum setting and is always on), medium and high. There are three wires connected to the knob, one for each setting.
Ideally, I would like the fan to turn on automatically when needed, for example while taking a shower. But it would be nice to be able to turn on the fan from the kitchen while cooking.
What to use
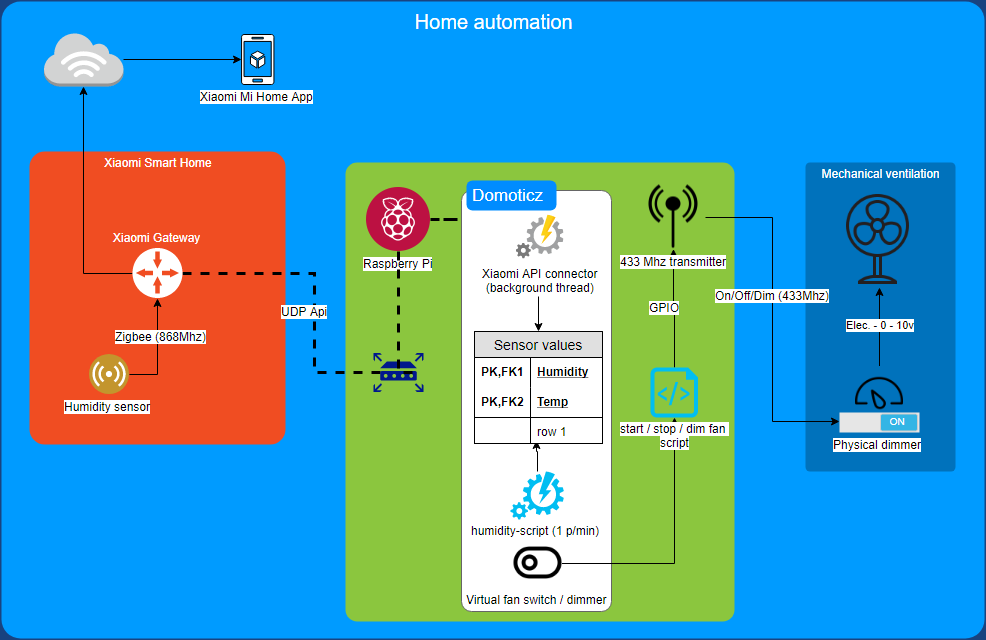
In the following sections I’ll go through the hardware and software used for this project. I’ve never done anything like this before, so I kept my goal simple: just get something to work. At the end of this blog post you can find a complete list of used hardware, software and extra info.
What to use - home automation system
Initially I was reading about home automation on a Dutch tech site, called Tweakers. It seemed that a lot of people were using Domoticz, which is a lightweight open source home automation system. The documentation seemed quite extensive and it seems to support a lot of different systems (sensors and switches), so I decided to take it for a spin for this project.
What to use - fan
I went online to figure out what to do with the CMFe fan, as expected, there is more than one way to control it remotely. It left me with these options:
- Option 1, easy but expensive: put an extra switch in the bathroom, either by connecting it through a wire or by buying a remote controller/receiver set for the fan
- Wire - too much work
- Wireless - for about 100 euro there is an official remote sender and receiver set, with a switch that you can just stick on the wall easily
- Wireless - for about 250 euro there’s an official humidity sensor + receiver set
- Option 2, custom fan control:
- Relay switch(es) - There are three wires that control the fan speed. By adding some remote controlled relay switches it should be possible to set the fan to the required speed.
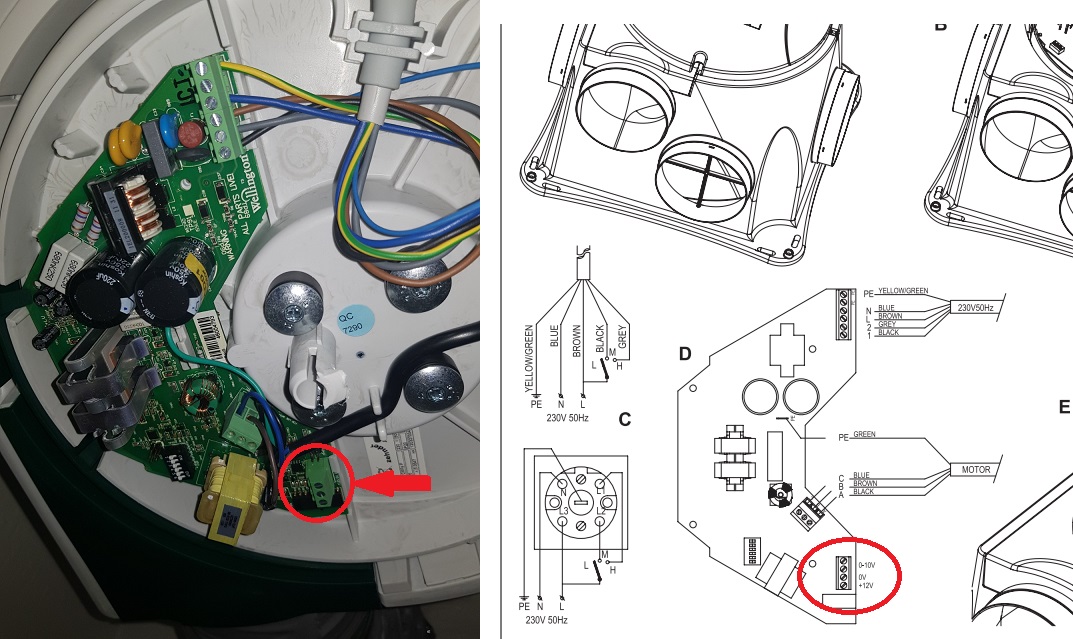
- Variable fan speed - Reading through the manual I found out that the fan has a 0-10v input which controls the fan speed. This means that if you put 0v on the input it runs at the lowest rpm and if you put 10v on the input, it runs on the highest RPM.
I decided to go for the most flexible option: option 2 with variable fan speed. It is quite easy to find a device that provides 0-10v output, as LED dimmers use that exact same range. This means that we can add a LED dimmer to the 0-10v input and control the fan speed by using the dimmer.
What to use - sensors
Although I still have some simple bme180 TPH (temperature, humidity and pressure) sensors laying around, which I have never put to use, I decided to go for Xiaomi Mi Home sensors. A couple of months ago, I went to a Xiaomi store in Hong Kong and I spotted some sleek looking home automation devices from Xiaomi/Aqara. They’re really cheap, especially if you keep in mind that it also houses a battery and some communication hardware in a very tiny encasing (36mm x 36mm). I decided to try it out; if I couldn’t get it to work, I could resort to building my own device anyways. The gateway was a bit more expensive, around 20 euro’s, but still cheap enough and the reviews were very positive.
As expected, Domoticz also supports Xiaomi Mi Home sensors. It involves enabling developer mode and adding the device to Domoticz, after which Domoticz will receive sensor values through the UDP developer API provided by Xiaomi.
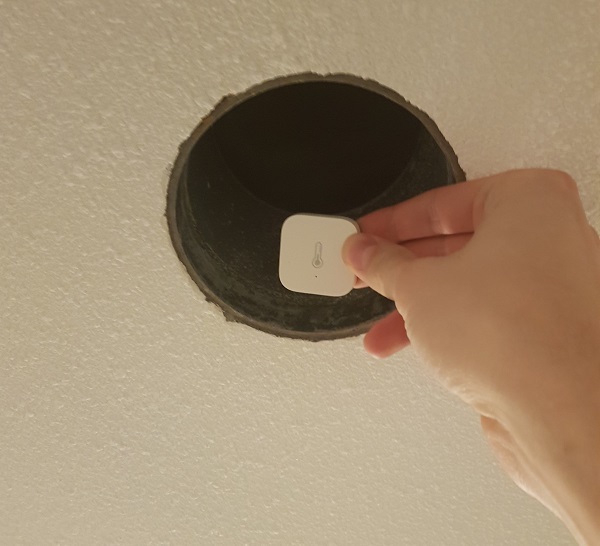
Here you can see me placing a TPH sensor in an air duct.
What to use - communication
As I just started with this whole home automation, I decided to go for a cheap and simple option: 433MHz communication. To be able to transmit messages I bought a FS1000A 433 MHz transmitter for about 1 euro. On the other end I need a LED dimmer with 0-10V output which operates on 433 MHz. One example of such a device is the ACM-LV10 Click-on-click-off LED dimmer which set me back about 20 euro (in NL).
Wiring it all up
- Step 1 - Install Domoticz on the Raspberry, which is a piece of cake: just run
curl -L install.domoticz.com | sudo bashsee here. - Step 2 - Set up Xiaomi Mi Home using this great video tutorial
- Add the Xiaomi gateway and sensor in the Xiaomi app
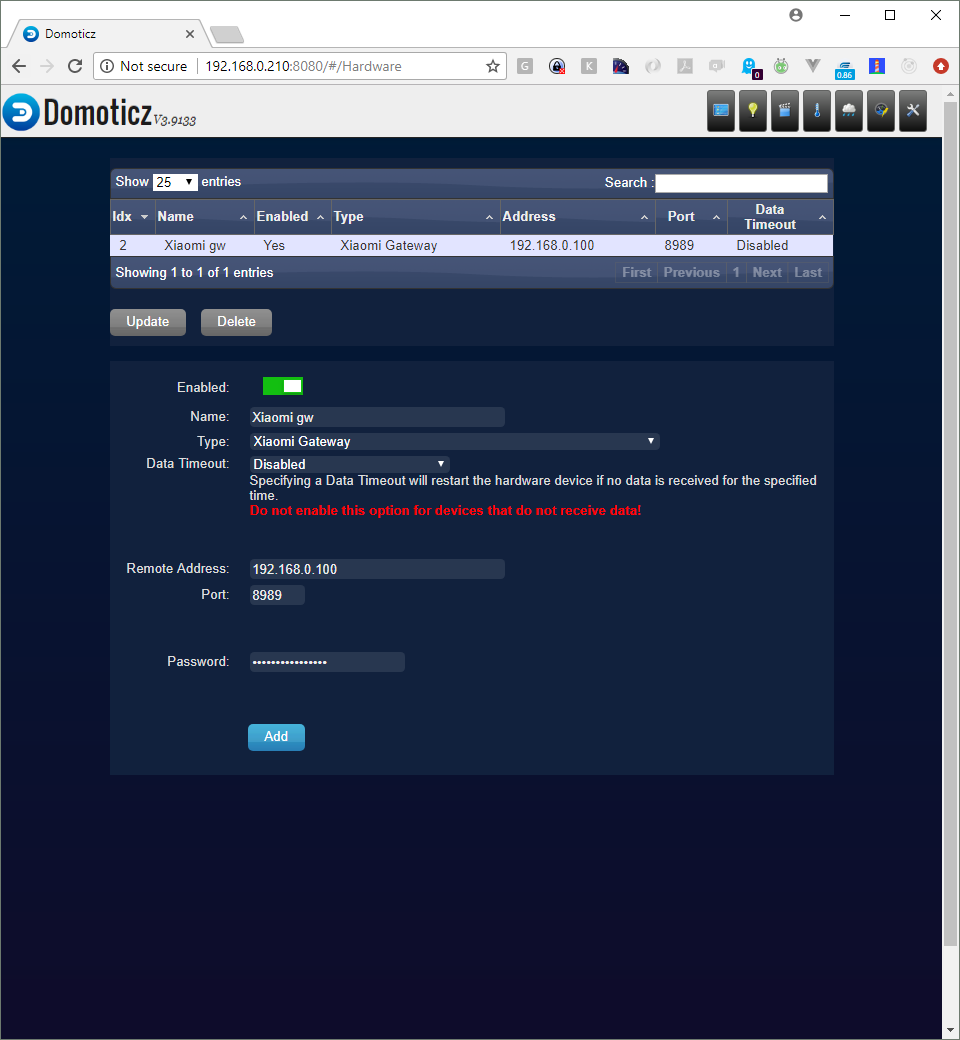
- Step 3 - Enable developer mode and add the Xiaomi Gateway to Domoticz
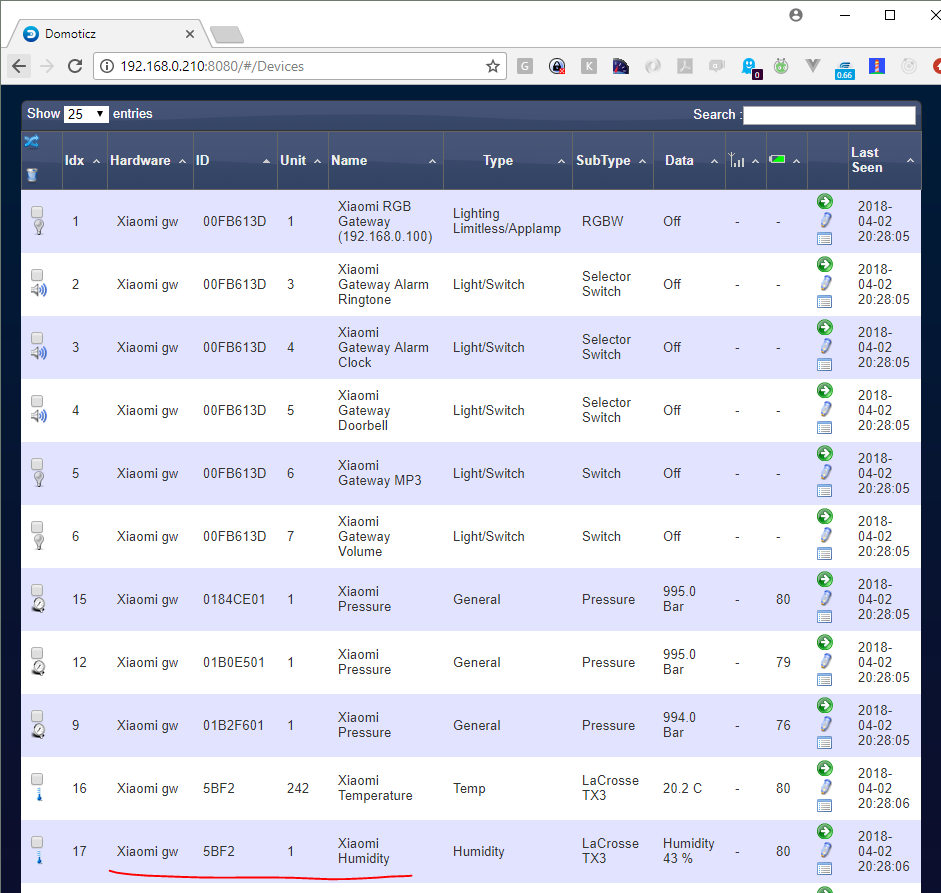
- You should now receive sensor updates for the Xiaomi sensor in Domoticz
- Step 4 - Wire up the 433 Mhz receiver and transmitter
- Wiring tutorial can be found here
- Run
make allin the RPi_utils folder - Run
sudo ./RFSnifferandsudo ./codesend 1234. The RFSniffer should displayReceived 1234
- Step 5 - Wire up the ACM-LV10 to the CMFe logic board
- You have to use an external power supply, the 12V port on the logic board of the fan is not able to supply enough power, apparently it only provides 20mA which will cause the ACM-LC10 to turn on but it doesn’t actually work
- Flip dip switch 6 on the board in order to enable the 0-10v input
- Step 6 - Send a message to the ACM-LV10
- In order to communicate with the KaKu switch, I’ve used the code in this repository as it has the proper protocol for Klik aan Klik uit devices. See install for info on how to build
- Press the reset button on the device
- After building start the deamon
sudo ./433mhzdaemon &and send a message to configure this device with any arbitrary code, in this case address 123 and device 1:sudo ./kaku 123 1 on - Regulating the fan speed is done by sending a dim command with values between 0-15, where 0 is low and 15 is high:
sudo ./kaku 123 1 dim 0,sudo ./kaku 123 1 dim 15 - Interesting article to read about communication protocols on 433 Mhz
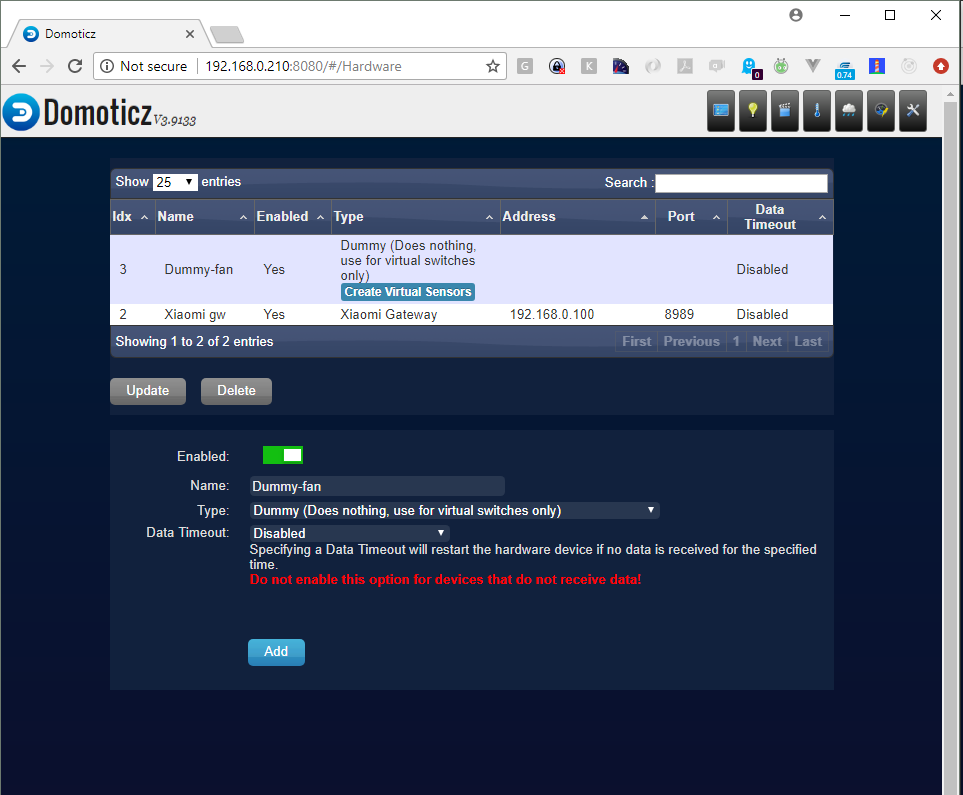
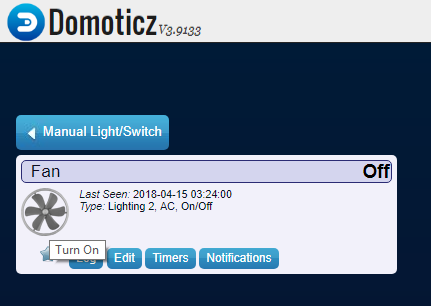
- Step 7 - Add virtual hardware and a manual switch to Domoticz
- Go to hardware and add a dummy device
- Go to Switches and add a manual switch, Switch Type On/Off and type doesn’t really matter at this point since I’ll be using some custom scripts
- Add a script for On Action and Off Action respectively,
script:///home/pi/domoticz/scripts/start-fan.shandscript:///home/pi/domoticz/scripts/stop-fan.sh. - With this virtual switch you can turn the fan on or off manually through Domoticz
- Step 8 - Add a script to monitor humidity levels
- There’s a Domoticz lua script for controlling the humidity
- It will trigger the virtual switch from the previous step
- If there’s a sudden increase in humidity, it will keep the fan on for max 2 hours or until the humidity reaches the same level as before
Trying it out
After turning on the shower, the humidity level increases quite fast. Within a couple of minutes the humidity level reaches around 90~100%.

The humidity script is executed every minute and it turns on the fan once the sensor has sent a message. It will take a couple of minutes in total before the fan turns on, but that’s actually quite nice as it allows the air temp of the bathroom to rise. After having had the fan on for a while, the humidity will have been suctioned away and the fan turns off again. I also customized the max fan level so it will only reach ~level 2 during the night. The fan set on full blast can be quite noisy, so this way it won’t interfere with sleeping and at this time of day it doesn’t matter if it takes a bit longer to dehumidify the room.
For now I’m happy with the result. The next project will be to add some CO2 sensors to the system. These sensors will measure CO2 level in the air, which is an important indicator of air quality. We already have a remote controlled fan, and we can use that to make sure we have proper air quality all the time!
Hardware
- Raspberry Pi 3 B+ - 40 EUR
- 433 MHz transmitter (FS1000A) and receiver XY-MK-5V) - 1 EUR
- Xiaomi Mi Home Gateway - 21 EUR
- Aqara Temperature Humidity Sensor - 6 EUR
- ACM-LV10 Click-on-click-off LED dimmer - 19 EUR